3D printers have been with us for decades, turning 3D computer designs into detailed physical objects.
These devices create models in a range of materials, including plastic, plaster, photopolymers, metal and sometimes even food. Each of these materials brings inherent advantages and disadvantages, depending on your application.
There’s one more to material to consider though: paper. Selective Deposition Lamination (SDL) or paper 3D printing was invented by Dr Conor and Fintan MacCormack in 2003.
Dr MacCormack saw the technology first-hand when he was earning his doctorate degree at Trinity College. Unfortunately, the school’s 3D printer was only a tease. Because of the high cost of the material, only one or two students could print a model at the end of the year, defeating the whole purpose of having the technology.
When he started working with Airbus as an engineer, he had ample access to a 3D printer – access he knew most students and engineers were denied. It just wasn’t right. Although 3D printer prices were declining, the cost of their materials was soaring. So Dr MacCormack and his older brother, Fintan, a qualified aircraft mechanic and electrical engineer, set out to invent a 3D printer with an operating cost so low the technology would be accessible to everyone. It was also important to make the printer robust enough for serious use in commercial settings.
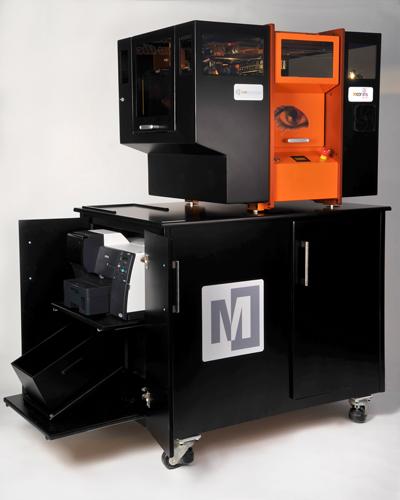
That vision has become a reality in the company the MacCormacks co-founded, Mcor Technologies, which manufactures monochrome and full-colour 3D printers that cost a fraction of any other 3D printing technology.
The key reason? While most technologies build models from expensive plastic or chemically infused powder, Mcor 3D printers use ordinary, affordable and ubiquitous A4 office paper as the build material.
SDL is not to be confused with the old laminated object manufacturing (LOM) technology. LOM used a laser, laminated paper and glue, so everything was glued together, including the support material around the model.
Printing with paper starts when the first sheet is manually attached to the build plate of a Mcor printer.
The placement of the first sheet is not important, as the first couple of pages are attached as a base layer before the actual part cutting begins. Once the blade depth and the adhesive levels are correct, the doors are closed and the machine is ready to accept data from a standard 3D file.
From a PC the user selects print and the 3D printer starts to make the part. The first thing that happens is that a layer of adhesive is applied on top of the first manually-placed sheet. The adhesive is applied selectively – hence the name SDL – “Selective”.
This means that a much higher density of adhesive is deposited in the area that will become the part, and a much lower density of adhesive is applied in the surrounding area that will serve as the support.
A new sheet of paper is fed into the printer from the paper feed mechanism and placed precisely on top of the freshly applied adhesive. The build plate is moved up to a heat plate and pressure is applied. This pressure ensures a positive bond between the two sheets of paper.
When the build plate returns to the build height, an adjustable Tungsten carbide blade cuts one sheet of paper at a time, tracing the object outline to create the edges of the part.
When this cutting sequence is complete, the machine starts to deposit the next layer of adhesive and the whole process continues until all the sheets of paper are stuck together and cut, and the model is finished. Items from the 3D printer are tough and durable.
If you’re using the Mcor IRIS full-colour 3D printer, there’s one more step. Before any cutting, the Mcor IRIS pre-prints the colour outline of the part on each page in the appropriate colour combinations using a modified 2D colour inkjet printer that sits in the IRIS stand. Mcor’s patented water-based ink permeates the paper, preventing any white edges on the part.
In order to be fully accessible, 3D printing must be affordable to use on an ongoing basis. Mcor’s decision to use ordinary A4 and letter paper as the build material was an easy decision.
Despite using low-tech paper as the build material, Mcor 3D printed models are strictly professional class. They are cut to a precision of 0.00047in (0.012mm) and a dimensional accuracy of 0.004in (0.1mm).