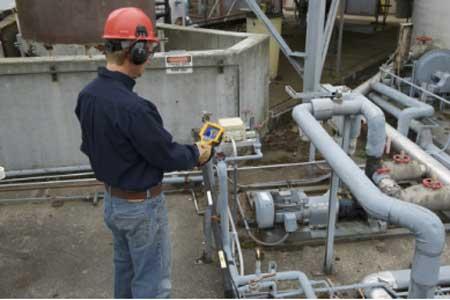
If a tree falls in the forest it makes a noise, whether anybody’s there to hear it or not. Just like that fabled tree, machines in trouble provide telltale evidence you can read to diagnose their problems – if you just know how to look and listen.
Two of the most useful indicators are temperature and vibration. Most mechanical components emit a certain amount of heat and vibration in the normal course of operation. But excessive heat, cold or vibration can tip you off to underlying problems, so you can fix them before they lead to breakdown and bring production to a halt. New test tools – the Fluke Ti32 thermal imager and Fluke 810 vibration tester – are available to help measure heat and vibration and even interpret the data. They tell you what the underlying problem may be and guide you in making repairs.
An abnormally hot or cold spot or an unusual thermal pattern on process equipment often indicates an emerging problem. That makes handheld thermal imagers, which capture two-dimensional images of the apparent surface temperatures of objects, useful tools for regular predictive maintenance of pumps and other equipment. With thermal imaging users can discover and diagnose various issues, including high-resistance electrical connections, that impede airflow and bearing issues on motors, tank levels, and many mechanical problems. In a major Florida brewery, scanning with a Fluke thermal imager revealed that the gearbox of a bottle labeling machine was running hotter than normal – nearly boiling hot. A physical inspection showed that the box was filled with water, not lubricant. A damaged seal had allowed the water in. A breakdown could have shut down the bottling line.
One way to prioritise infrared scanning is to begin with critical assets whose failure would threaten people, property or product. Then determine what conditions add stress, and monitor those assets more frequently. For example, the sludge and particulates found in many processes put extra stress on motors – affecting bearings, windings and insulation. That stress can show up as heat detectable by a thermal imager. Such motors should be scanned more frequently than others.
Use your handheld thermal imager to look for hot spots, cool spots and other anomalies. Be especially aware of similar kinds of equipment operating under similar conditions but at different apparent temperatures. Such deviations might signal problems. A good approach is to create inspection routes that include all critical assets. Each time you inspect a piece of equipment, save a thermal image of it and the associated data on the computer and track its condition over time. That way, you will have a baseline for comparisons that will help you determine whether a hot spot (or cool spot) is unusual. You will also be able to verify when repairs are successful.
Whenever you use a thermal imager and find a problem, use the associated software to document your findings in a report that includes a digital photograph as well as a thermal image of the equipment. That is the best way to communicate the problems you find and to suggest repairs.
Vibration can be normal in machine operation – or it can be both a sign and a source of trouble. Most industrial devices are engineered to operate smoothly and avoid vibration, not produce it. In electric motors, rotary pumps and compressors, fans, and blowers, zero vibration is the ideal. In these machines, vibration can indicate problems or deterioration in the equipment. If the underlying causes are not corrected, the unwanted vibration itself can cause additional damage.
But how can the plant maintenance professional tell acceptable, normal vibration from the kind of vibration that requires immediate attention, to service or replace troubled equipment?
Common causes of machine vibration
Imbalance – A “heavy spot” in a rotating component will cause vibration when the unbalanced weight rotates around the machine’s axis, creating a centrifugal force. The cause could be a manufacturing defect or a maintenance issue. Imbalance can severely reduce bearing life and cause undue machine vibration and heat.
Misalignment/shaft runout – Angular misalignment occurs when the axes of a motor and pump are not parallel. When the axes are parallel but not exactly aligned, that is parallel misalignment. Misalignment may be caused during assembly or develop over time, due to thermal expansion, components shifting, or improper reassembly after maintenance. The resulting vibration may be radial or axial (in line with the axis of the machine) or both. Misalignment can cause coupling wear and failure.
Wear – As components such as bearings, drive belts or gears wear, they may cause vibration. When a roller bearing race becomes pitted, for instance, the bearing rollers will cause a vibration each time they travel over the damaged area.
Looseness – Vibration that might otherwise go unnoticed may become obvious and destructive if the component that is vibrating has loose bearings or is loosely attached to its mounts. Looseness can allow any vibration present to cause wear and fatigue in bearings, equipment mounts, and other components.
Effects of vibration
The effects of vibration can be severe. Unchecked machine vibration can accelerate rates of wear (i.e. reduce bearing life), damage equipment, create noise, cause safety problems, and degrade plant working conditions. In the worst cases, vibration can knock equipment out of service and halt plant production.
Measured and analysed correctly, vibration can be used in a preventive maintenance program as an indicator of machine condition, and you can target remedial action before disaster strikes. The handheld Fluke 810 vibration tester is designed and programmed to diagnose the most common mechanical problems of imbalance, looseness, misalignment, and bearing failures in a wide variety of mechanical equipment, including motors, pumps, fans, blowers, and more.
The Fluke 810 quickly detects vibration along three planes of movement, and then provides a plain-text diagnosis with a recommended solution. Its diagnostic technology analyses machine operation and identifies faults by comparing vibration data to an extensive set of rules developed over years of field experience. It is all done with the intelligence built into the tester, without the long-term monitoring, recording, and analysis required for typical long-term vibration monitoring programs.
Case study from oil industry
It was the ideal solution for the area logistics manager for a major oil company. For the past year he has been using the Fluke 810 vibration tester to diagnose issues in pumps, blowers and motors up to 3,500 horsepower that pump 8,000 barrels an hour.
“This is something I’ve been waiting on,” he said. “The neat thing about it is the Fluke will give you its idea of what it thinks is wrong. But it also gives you that signature you can give to the engineers. We went down to our transport station and were able to find some bearing problems on one of our units,” he said. The Fluke 810 “called out for a bearing problem. Once we got the pump into the shop we found out the shaft was out of round, which took the bearing out.” Ease of use is another advantage. “You can give this thing to just about anybody, and they can learn how to use it in a matter of a few minutes. You can log all your equipment, you can pair it up with Fluke’s infrared camera and it will give you a full picture.”
Used together with a Fluke thermal imager, the Fluke 810 delivers results fundamental to the company maintenance program. “With the big motors, we do the vibration analysis, we look everything over on an annual basis with the Fluke imager so we can see if there’s any heat rise, and we use it on all the switch gear,” he said. “I call it shoot – fix – move on.”
Characteristics of vibration
To understand how vibration shows up, consider a simple rotating machine like an electric motor. The motor and shaft rotate around the axis of the shaft, which is supported by a bearing at each end. One key consideration in analysing vibration is the direction of the vibrating force. An imbalance would most likely cause a radial vibration as the “heavy spot” in the motor rotates. A shaft misalignment could cause vibration in an axial direction (back and forth along the shaft axis), due to misalignment in a shaft coupling device.
Another key factor in vibration is amplitude, or how much force or magnitude the vibration has. The farther out of balance a motor is, the greater its amplitude of vibration. Other factors such as speed of rotation can also affect amplitude. As rotation speeds up, the imbalance force increases.
Frequency patterns in the data can be related to machine fault templates. By looking at the patterns, the user can identify the source of the vibration and therefore the machine fault. Examples of this include: motor shaft, components in the roller bearing, fan blades, gear teeth, and pump vanes.
It refers to the oscillation rate of vibration, or how rapidly the machine tends to move back and forth under the force of the condition or conditions causing the vibration. Frequency is commonly expressed in cycles per minute or Hertz (CPM or Hz). One Hz equals one cycle per second or 60 cycles per minute. Even a simple motor could be vibrating in multiple directions (radially and axially), with several rates of amplitude and different frequency patterns. Imbalance vibration, axial vibration, and vibration from deteriorating roller bearings could combine to create a complex vibration spectrum.
Email: mirna.maroun@fluke.com


